Targets - Manual Export: Configure a OneDrive Target Service
The system allows exporting 25,000 files from the platform to the local host machine. Manual data exports can be used to migrate files between storage systems or to extract data and review the files when they are stored in the Aparavi data format.
Before you start working with the connector, you will need to add and configure the application in the Microsoft Entra admin center. You can find instructions on how to do this here
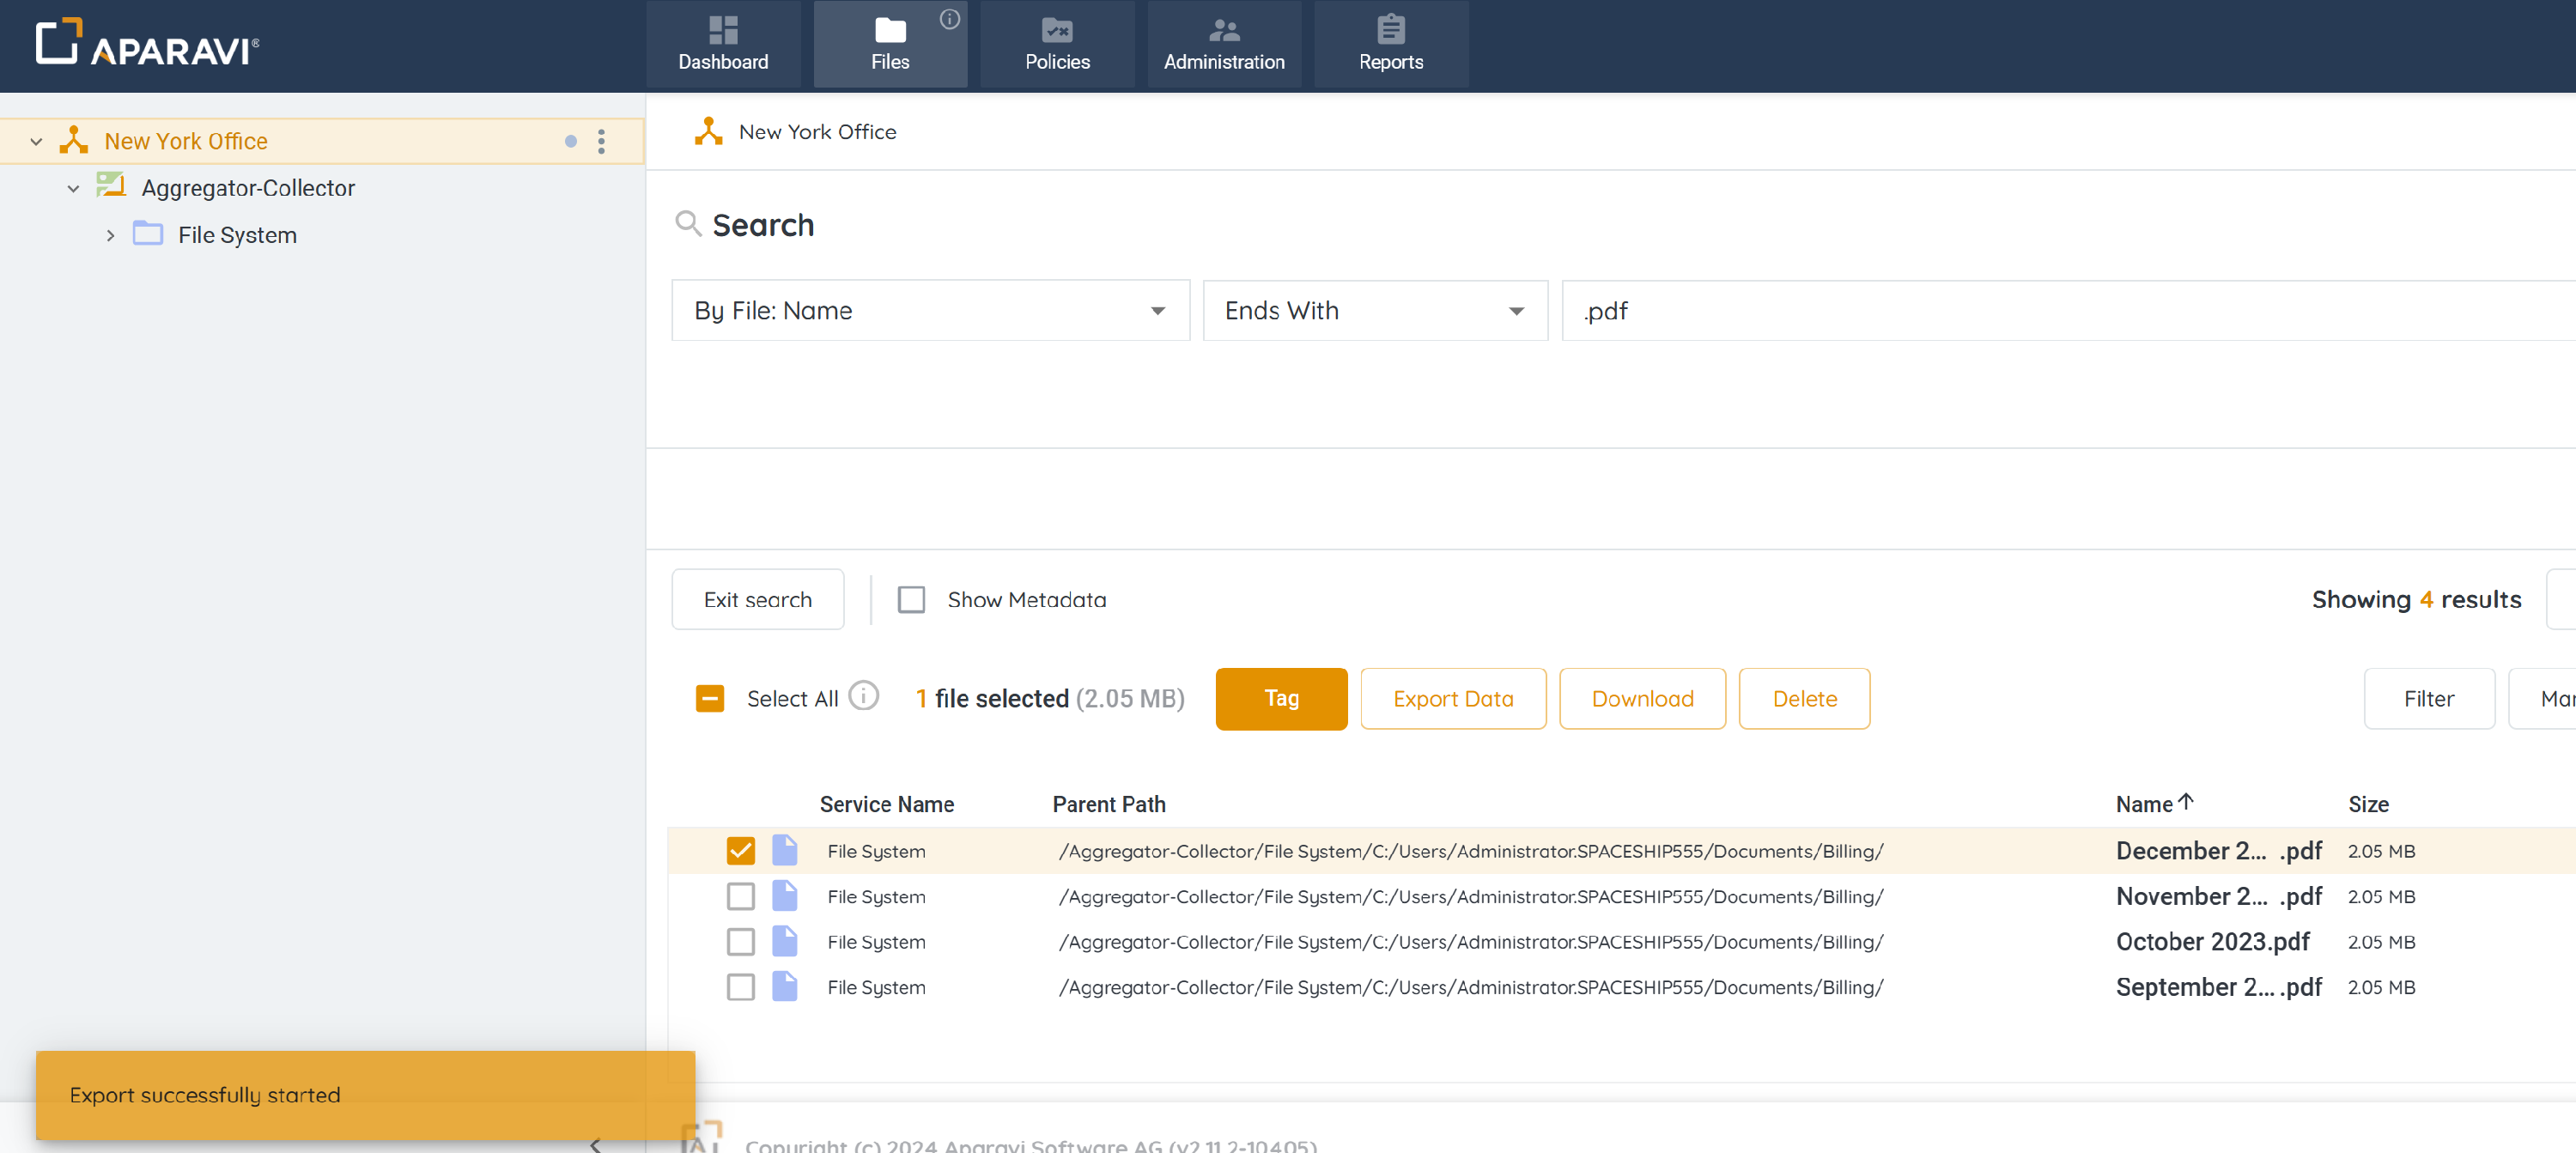
- Click on the Files tab, located in the top navigation menu.
- Perform any file search using the Query Builder and click the Search button.
- Select the checkbox located to the left of the file’s name. This will select the file for export.
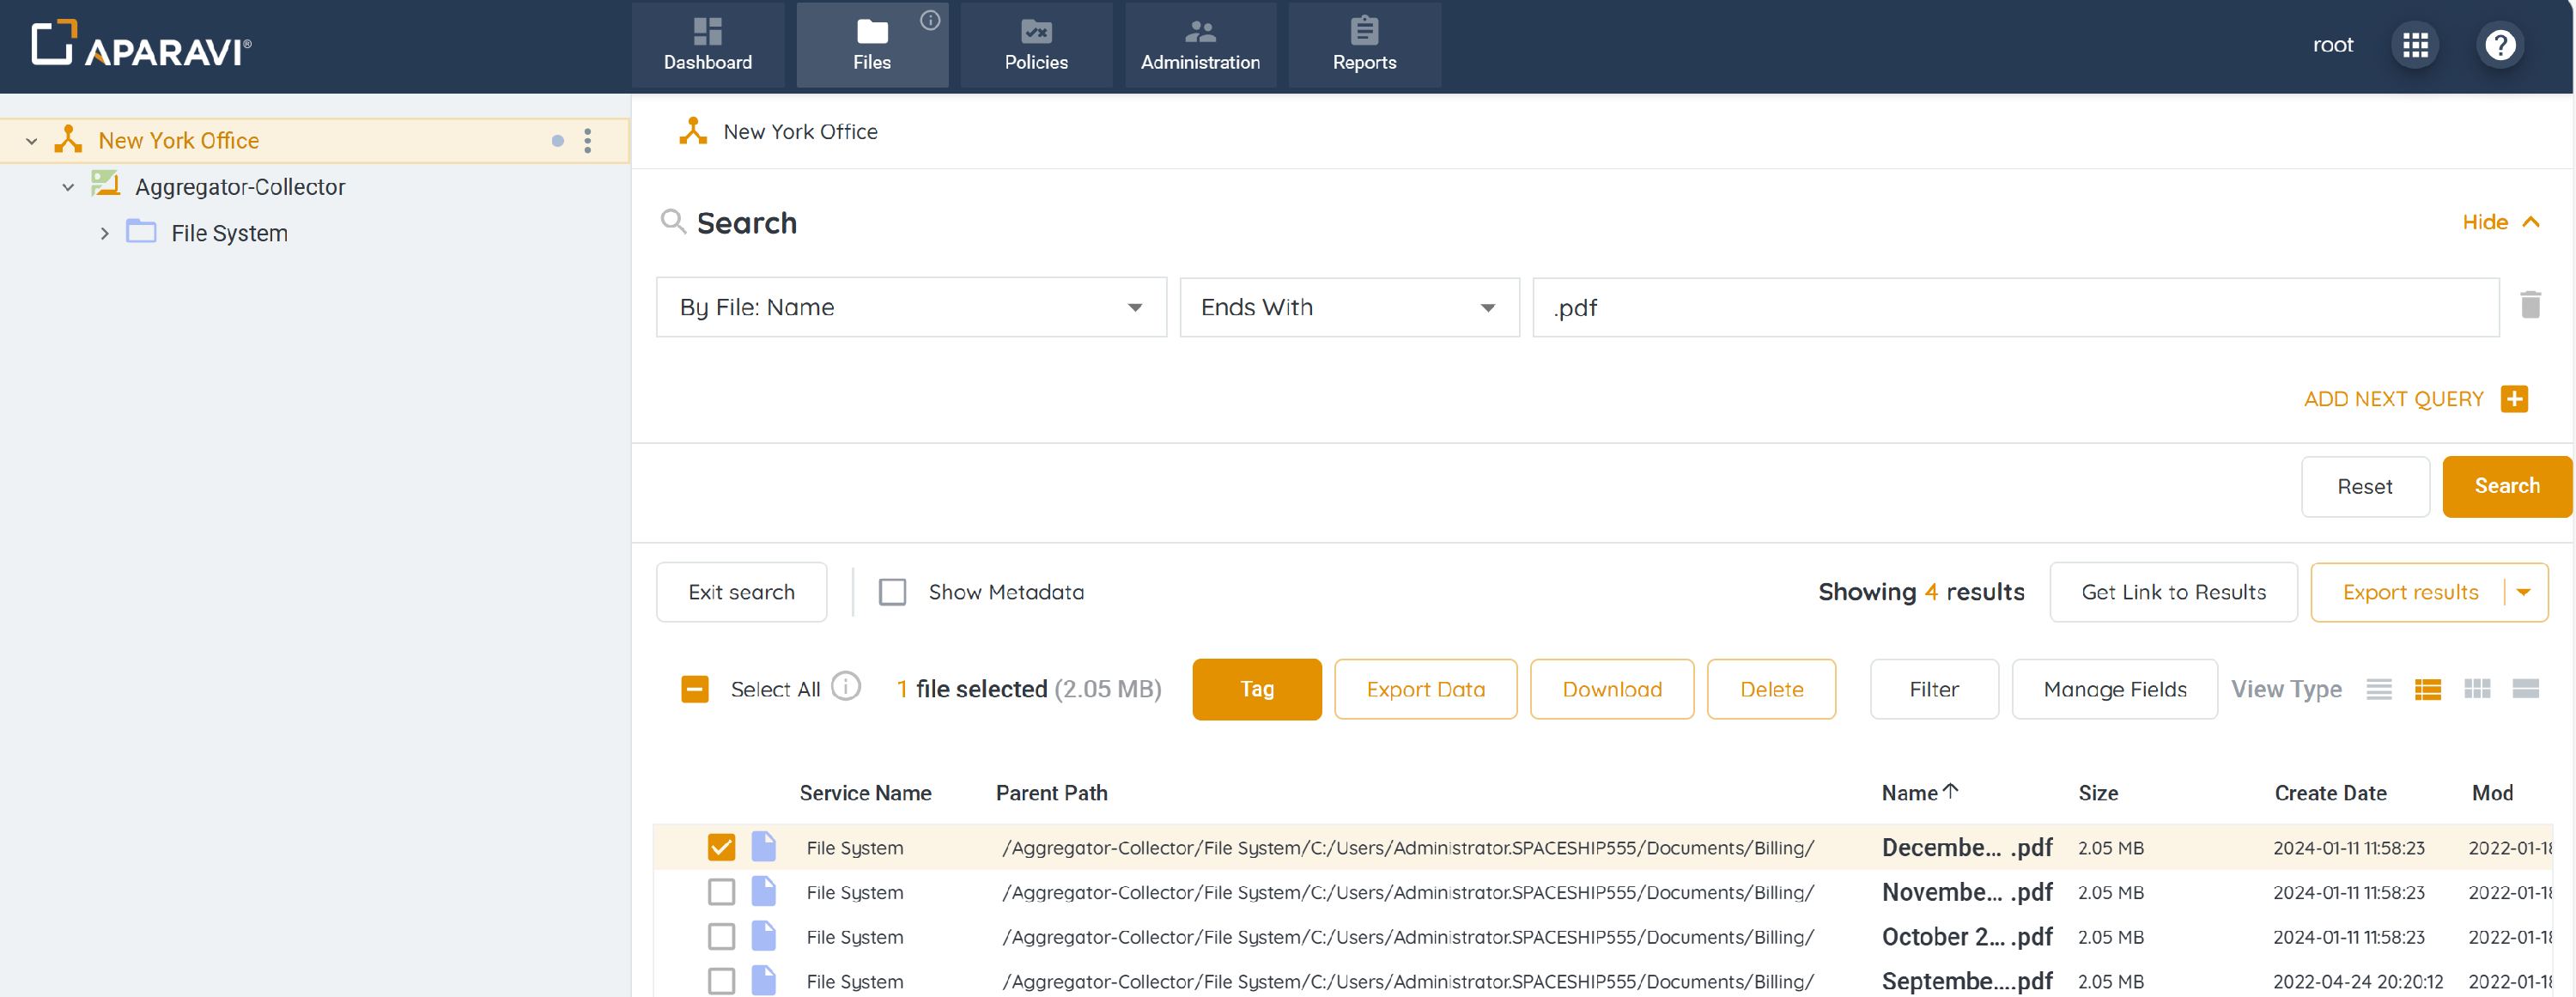
- To begin the export process, click on the highlighted Export Data button, located above the file results.
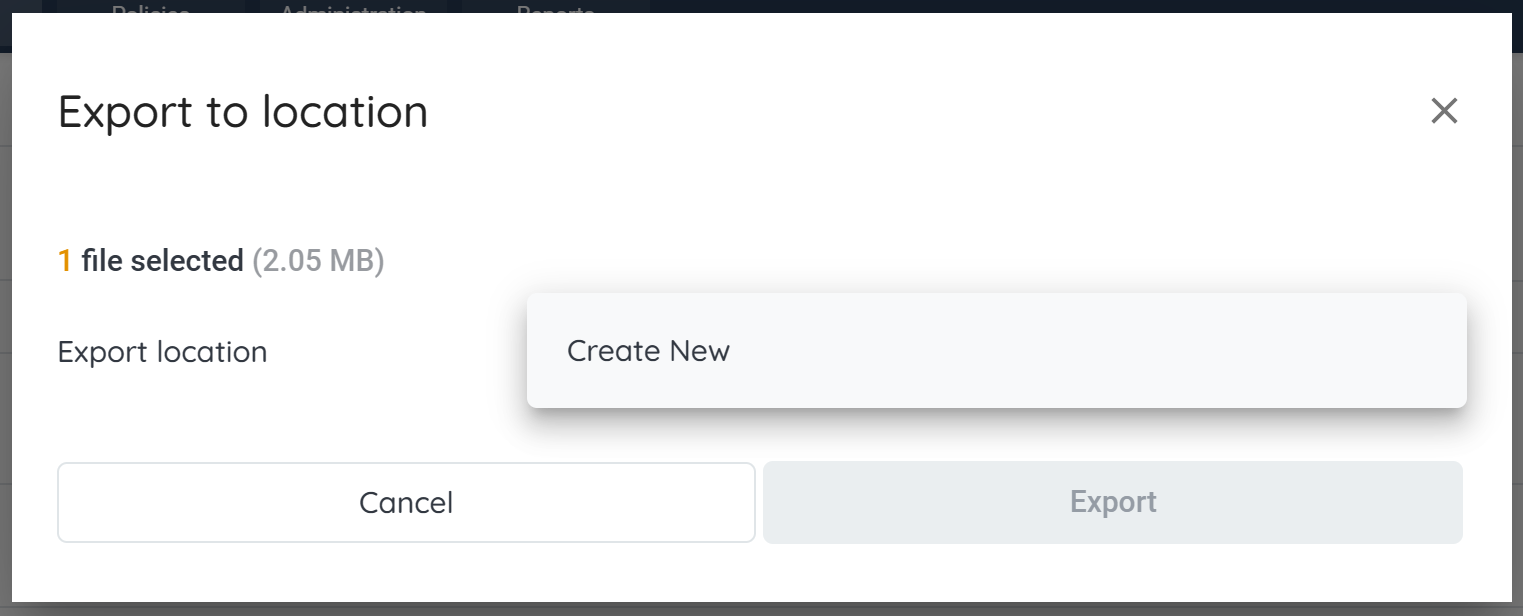
- Once clicked, the Export to location pop-up box will display and offer the Export location drop-down menu.
- Choose [Create New] from the drop-down menu.
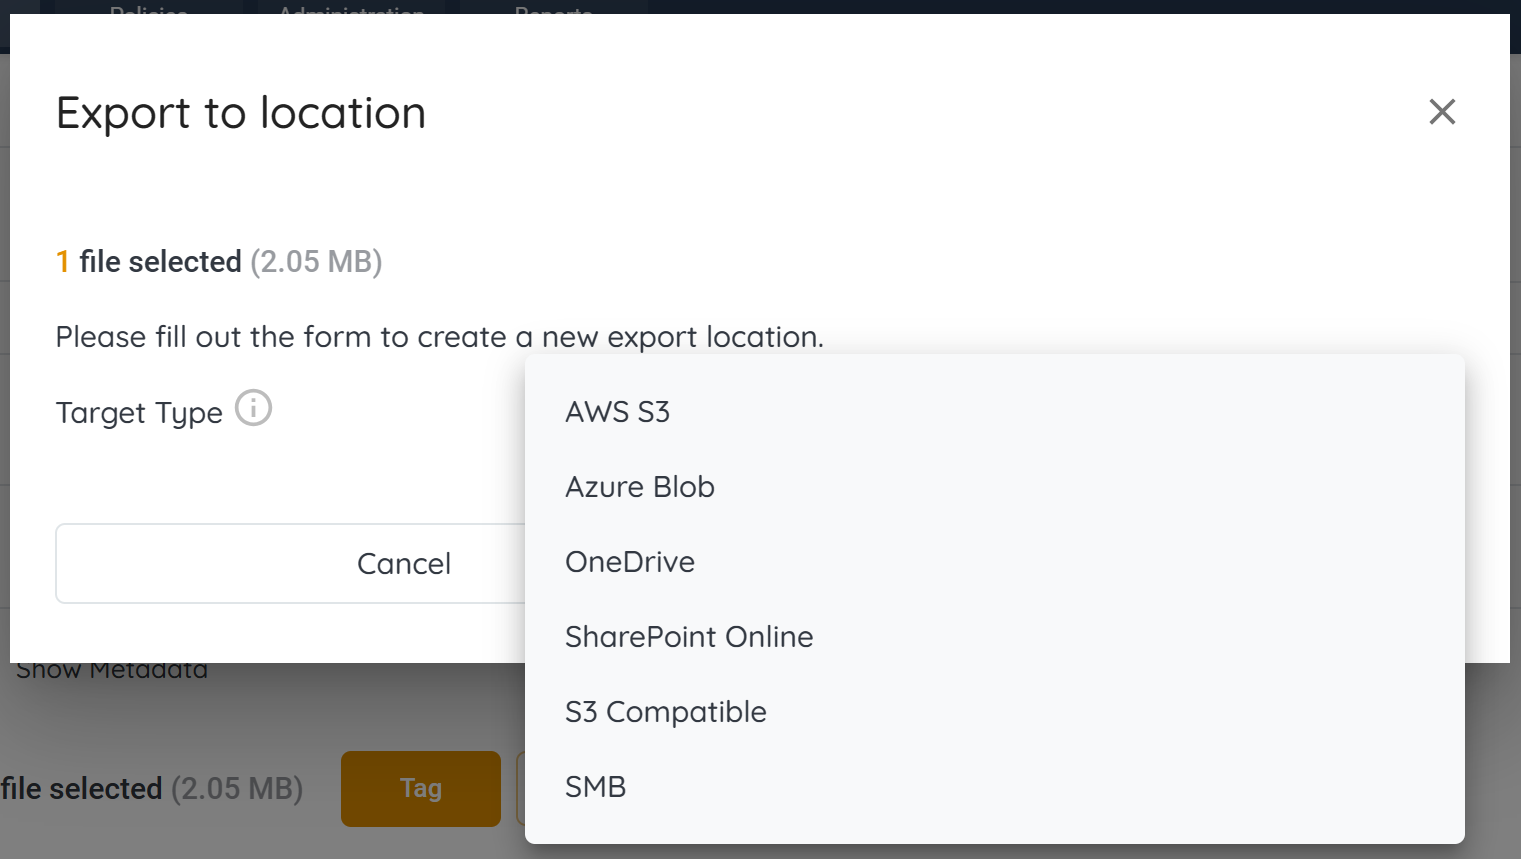
- Inside of the Export to location pop-up box, select OneDrive from the drop-down.
- Inside the Export to location pop-up box, enter the fields to configure the OneDrive export location:
- Target Type: This field defines the kind of target to connect to.
- Service Name: Enter any name for the OneDrive target.
- Configure Parameters:
- Store path: This path defines the exact specific folder in the filesystem.
- Store Path format for OneDrive: user ID/foldername. For example: aparavitest@microsoft.com/exportFolder.
- Region: This specifies the data center regions for the OneDrive account.
- Tenant Id: It is a unique identifier different to your organization name or domain. Tenant Id can be found in Microsoft Entra.
- Client Id: The Client Id created for your application (configuration in Microsoft Entra).
- Client Secret: The Client Secret for your application (configuration in Microsoft Entra).
- Store path: This path defines the exact specific folder in the filesystem.
- Common Target Path: A prefix path to strip off the destination.
- Once all information has been entered into the Export to Location pop-up box, click Validate.
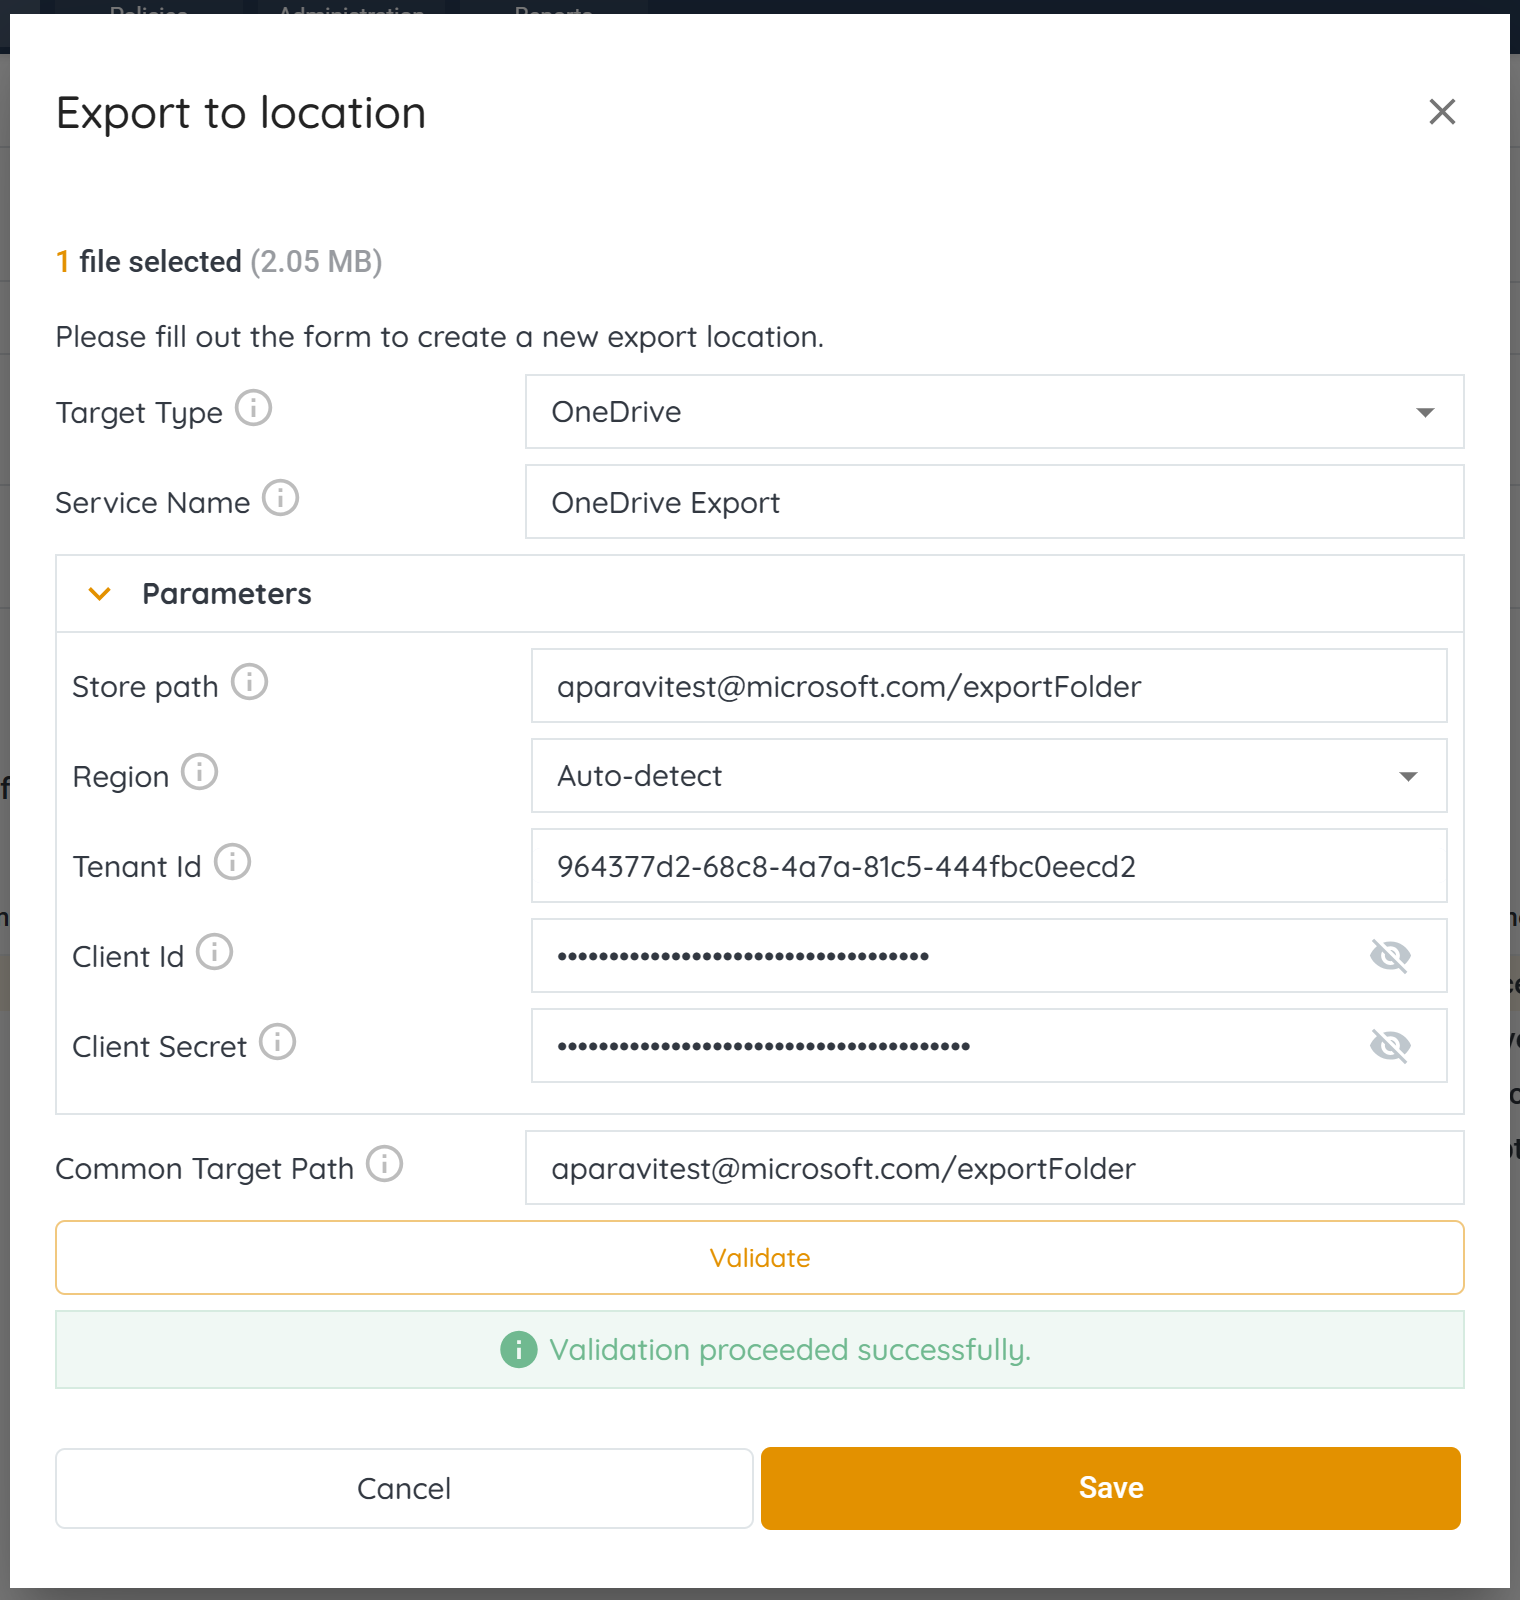
- Click Save, located at the bottom right-hand side of the pop-up box. All information will be saved and the Export button will become active.
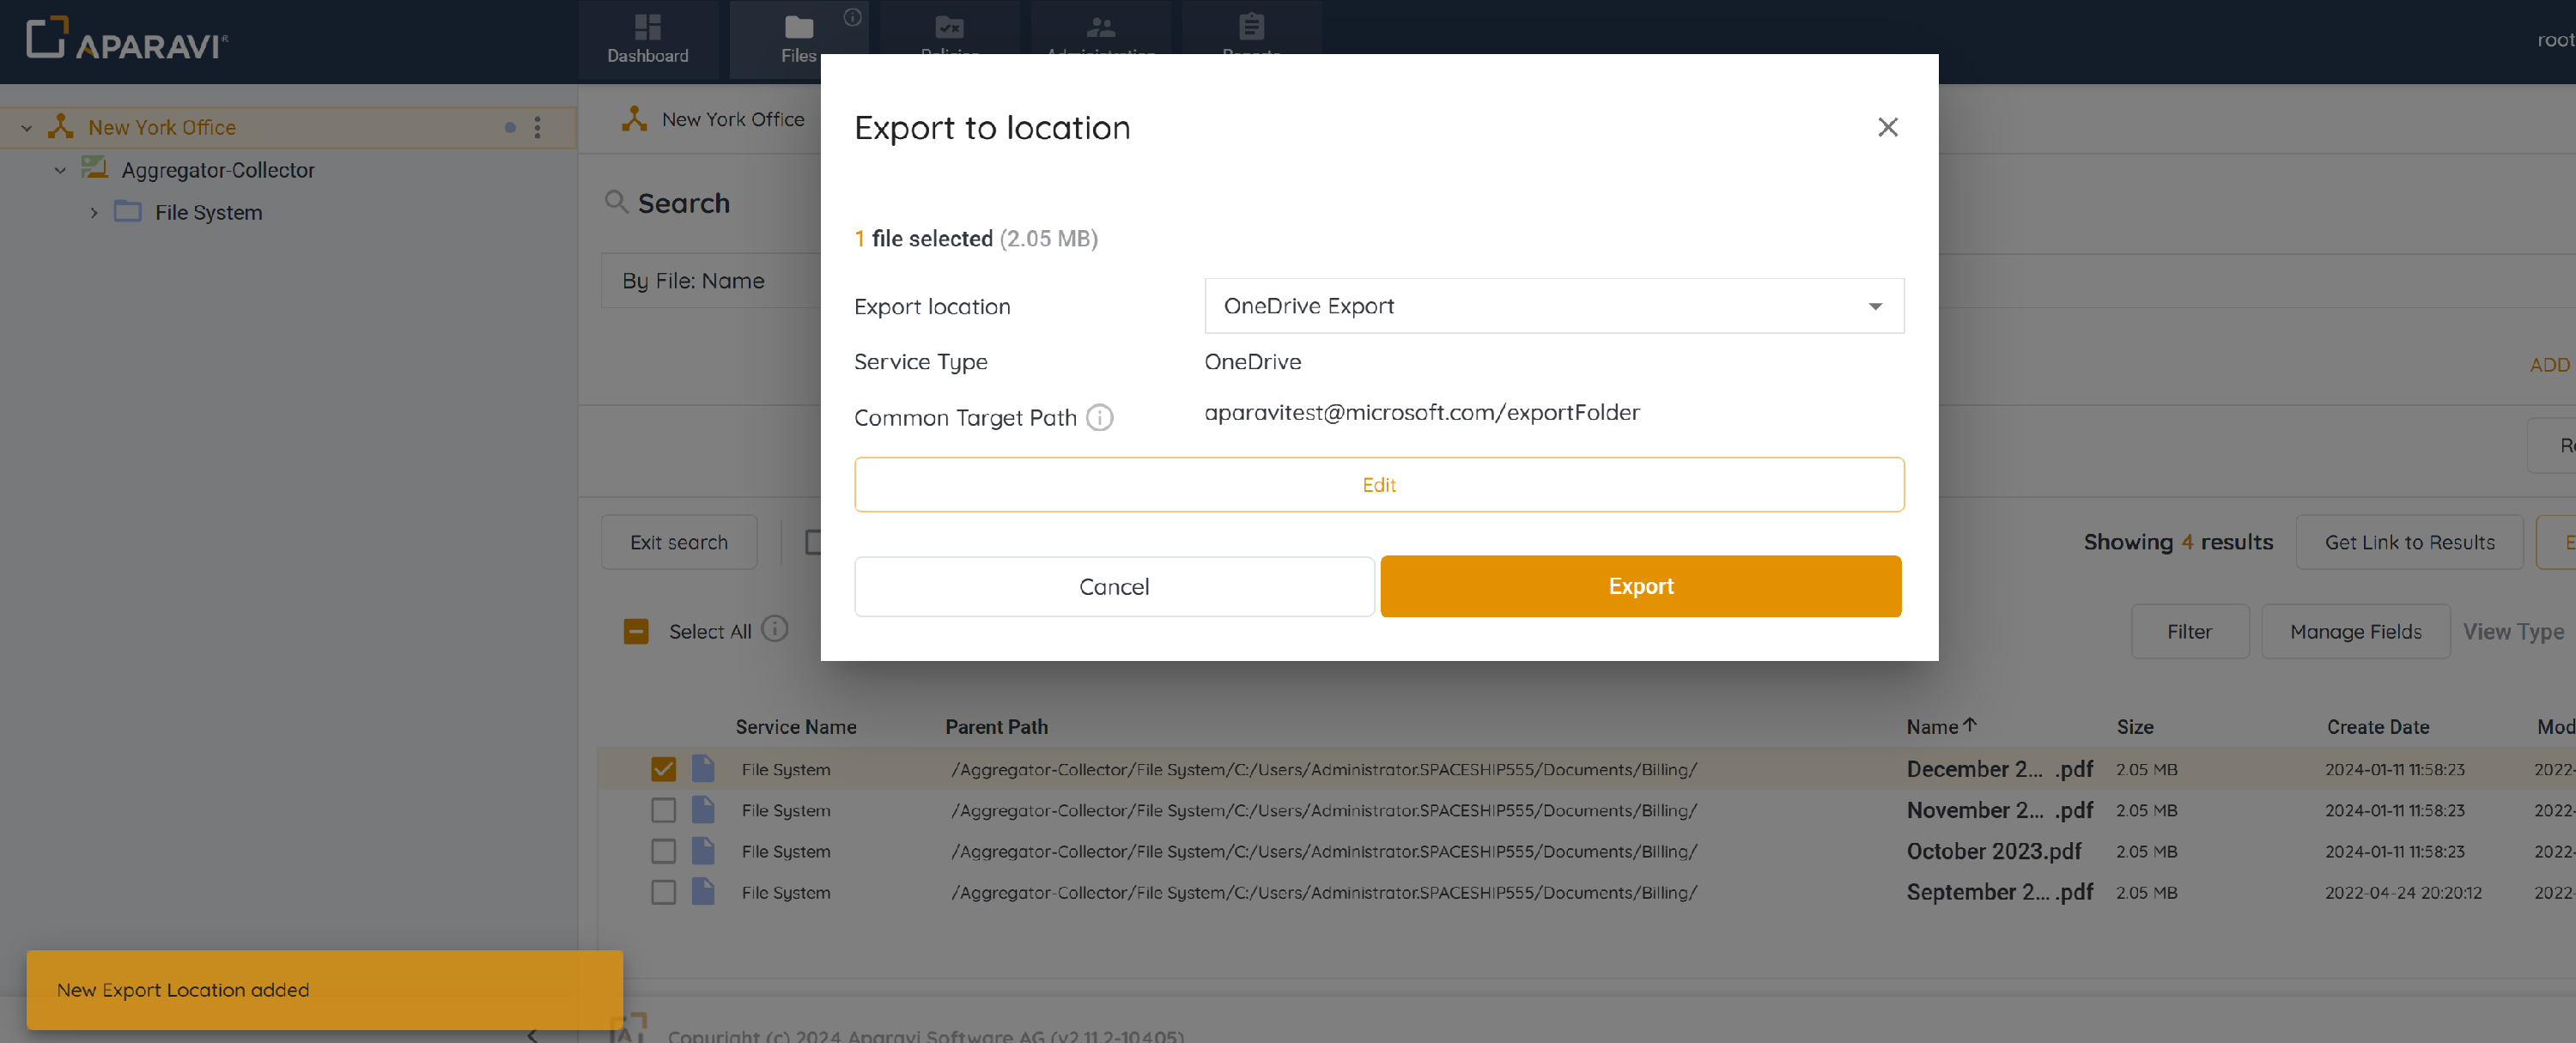
- Click Export button. Once completed, the files will begin to export to the selected location.
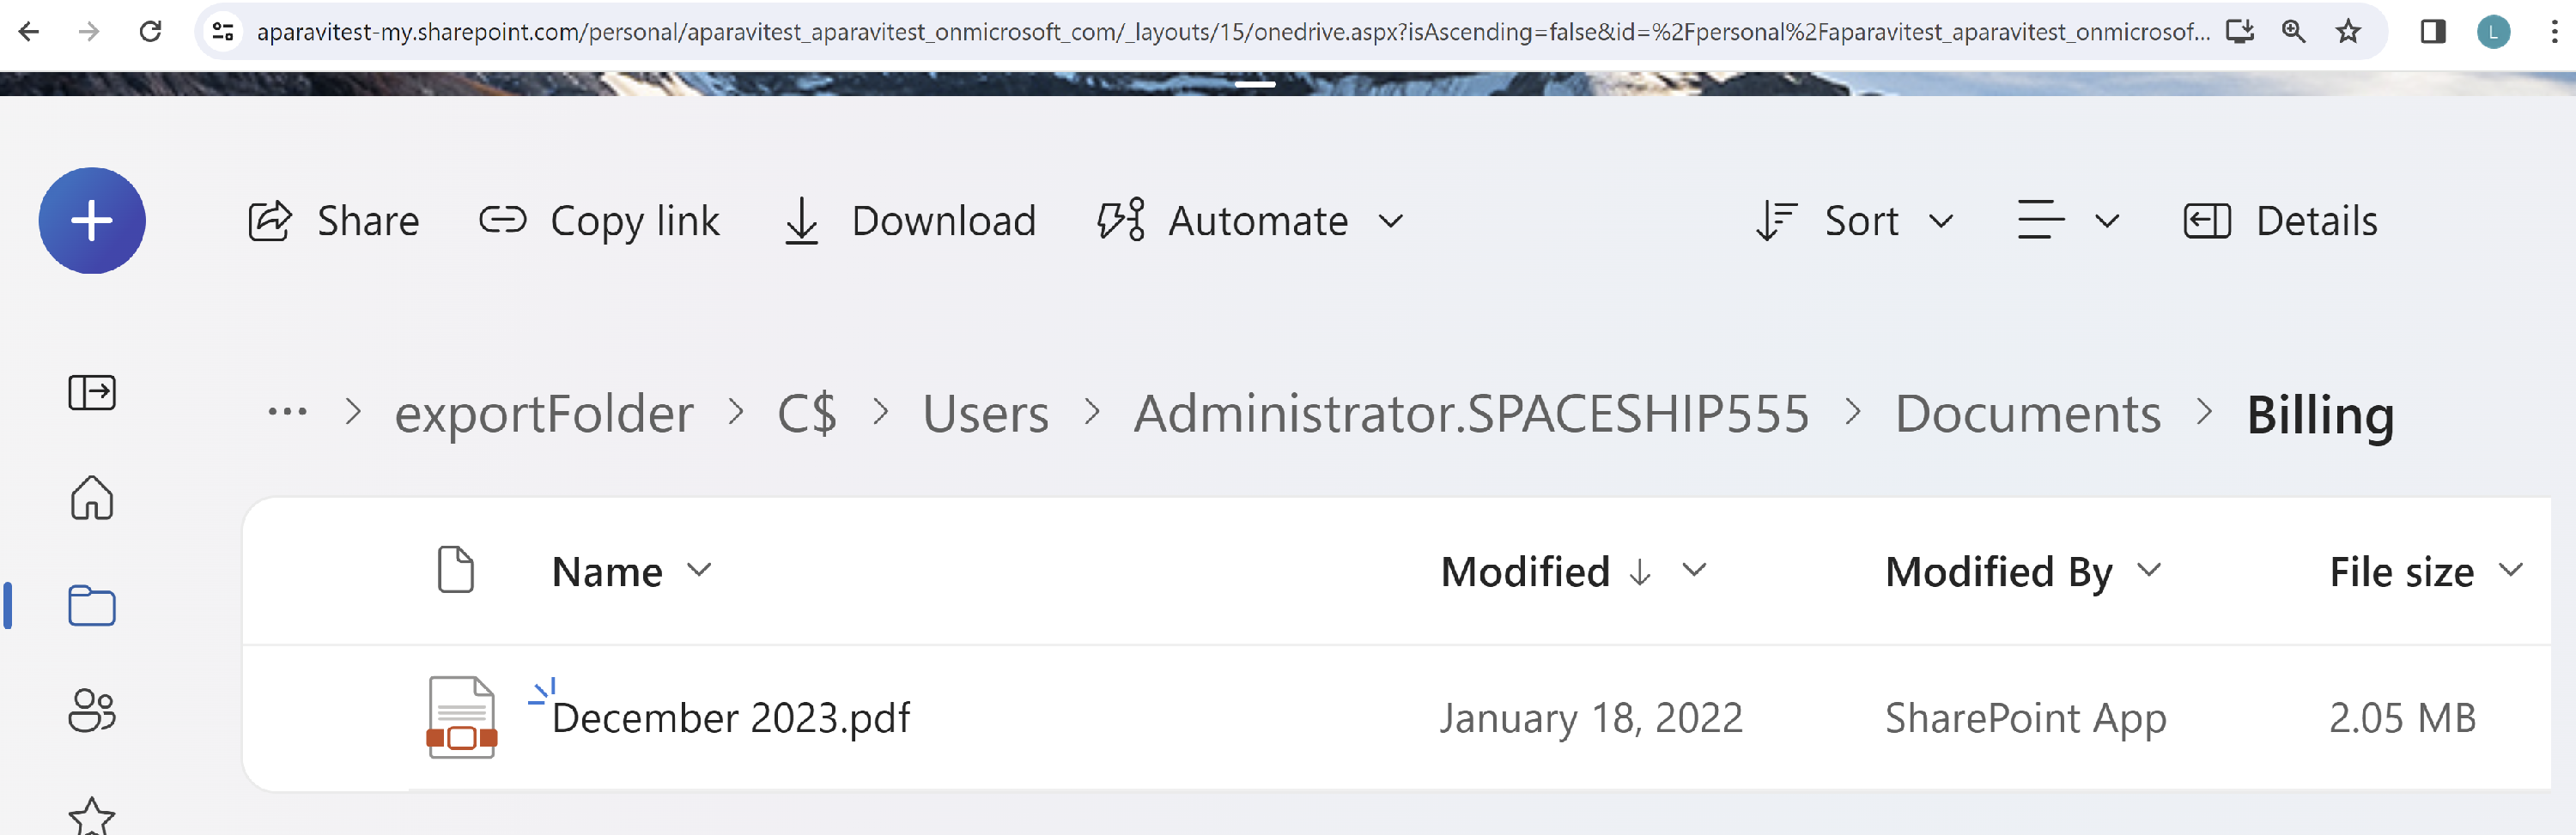
- To view the exported files, check the location specified during the export process. The folder will display all selected files in their native format.