Reports - Save a Custom Report
Once a query has been completed, it can be reproduced without having to repeat the process of performing the same steps each time. After a report has been saved, simply click on the run button and the query results can be searched for automatically, applying the same filters and alterations of columns.
- Once the query results are displaying, click on the Save As button, located in the reports toolbar. The Save As option will be shown as a floppy disk icon. Once this button is clicked, the system will display the Save As pop-up box.
- Inside of the Save As pop-up box, click the textbox next to the label “Name” enter the name the report should be saved as.
- Inside the Save As pop-up box, choose whether the report will be a Private report or Public report.
- Private reports: can only be viewed by the account under which it was created, no other Aparavi users will be able to view this report.
- Public reports: can be viewed by all Aparavi users within the same organization, enabling quick results to be shared.
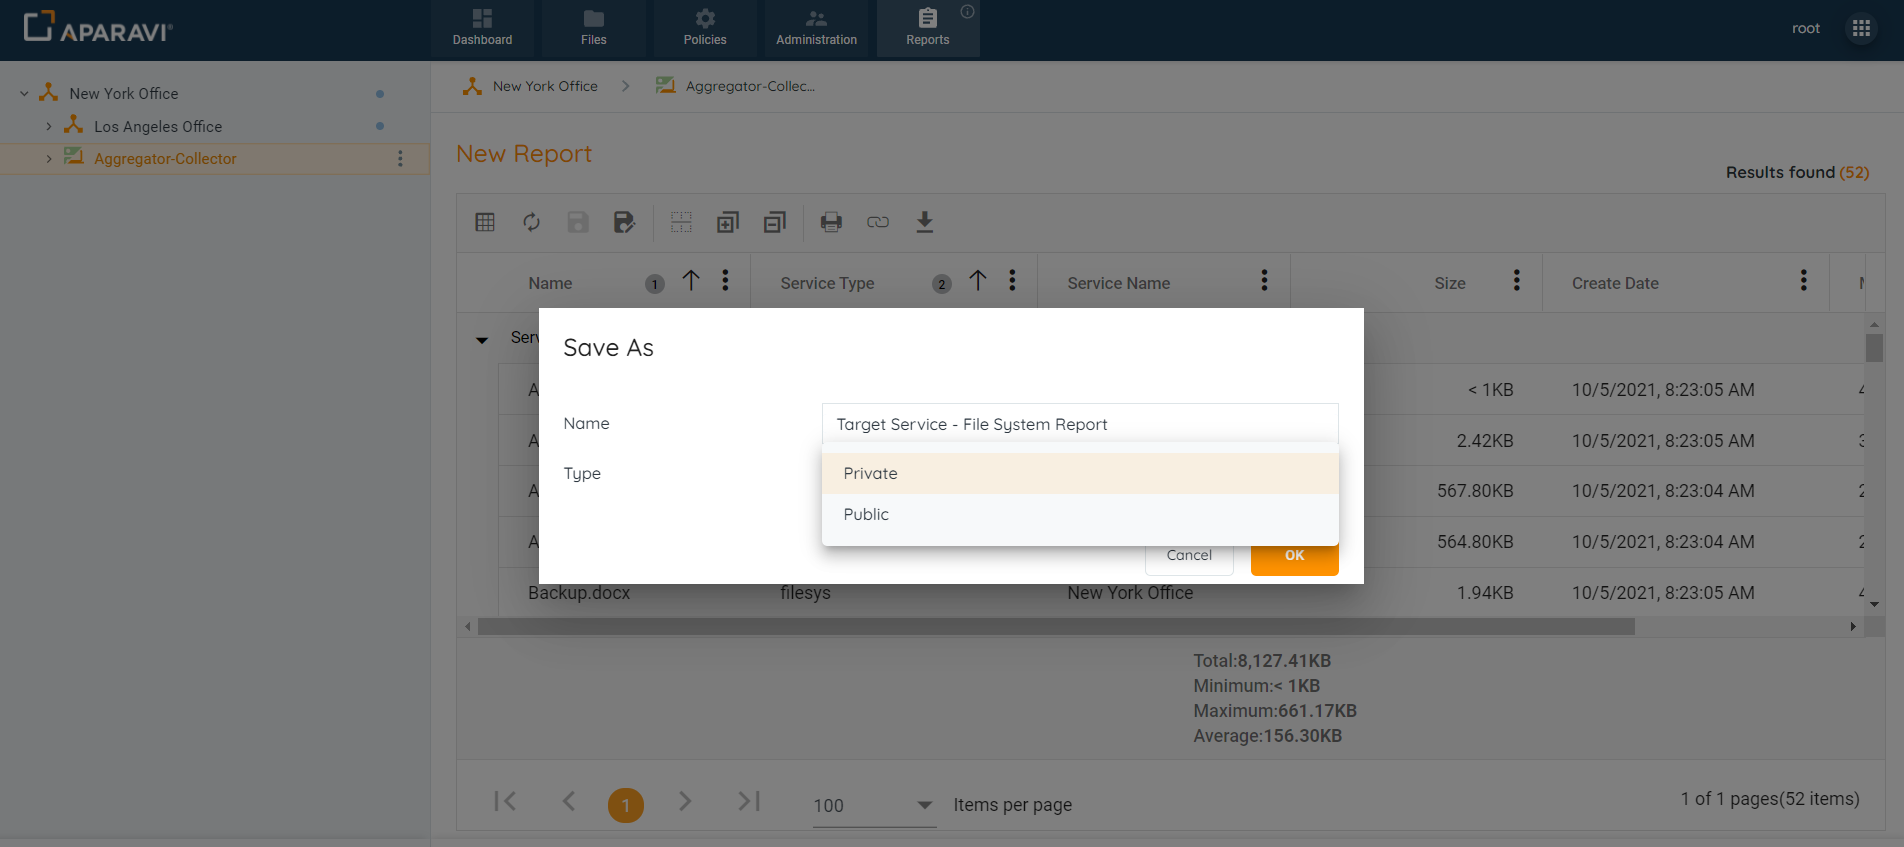
- Once all selections have been entered into the Save As pop-up box, click the OK button.
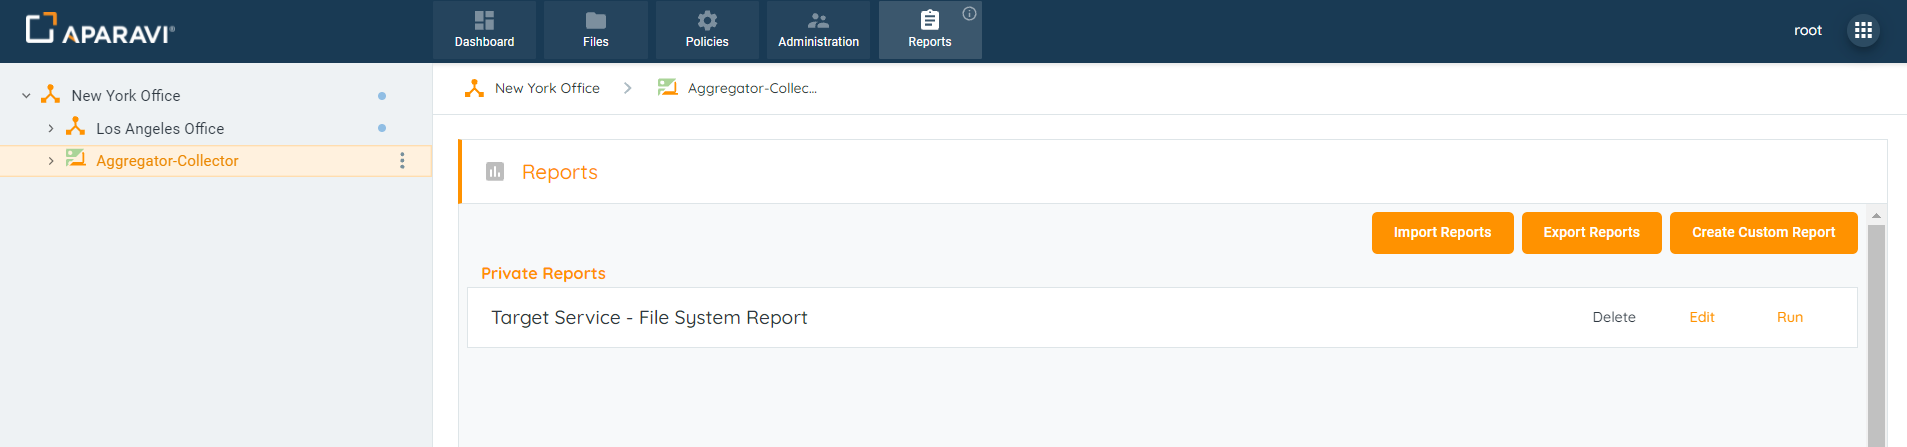
- Once the report has been successfully saved, the system will display an alert, located in the bottom left-hand side of the screen.
- To view the saved report, click on the Reports tab, located in the top navigation menu.
- Once on the Reports tab, the saved report will appear under either the Private reports section, or Public reports section, depending on which option was selected.
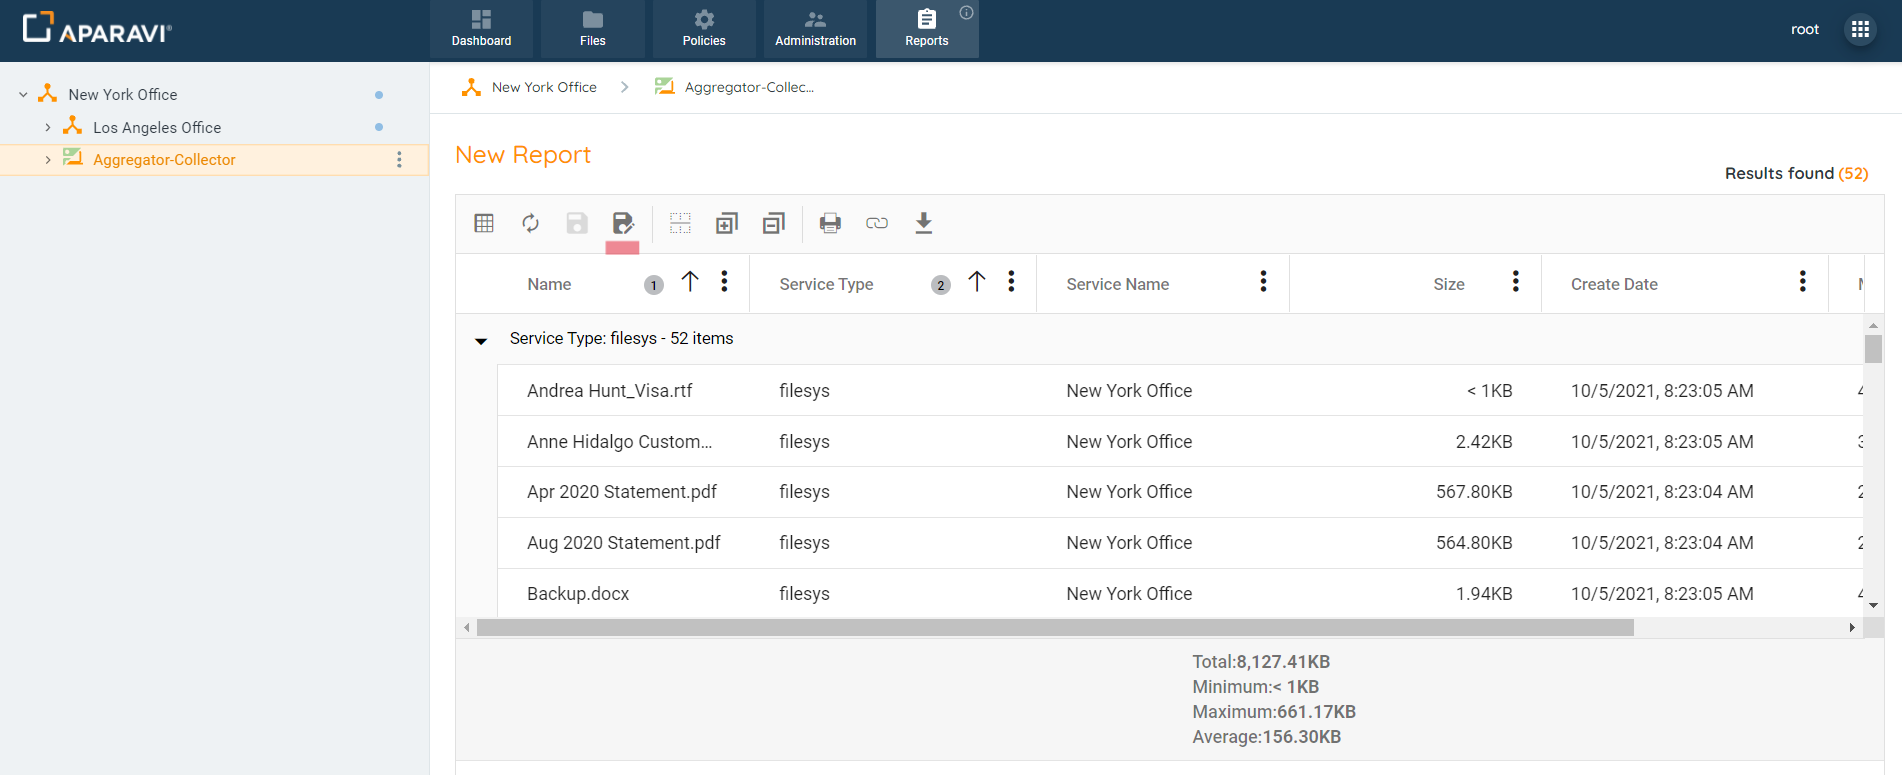
- Once the report has been run, the results are displayed in the window below the toolbar.